How to measure flexo print contrast
And why not measuring it could be negatively impacting your print quality
Please raise your hand if you are struggling to improve your tonal range. There is nothing more frustrating than trying to duplicate a designer’s images and finding that your shadows have all blended together and become overly saturated. Well, there’s good news: expanding your tonal range doesn’t have to be that daunting because by improving your print contrast, you will expand your tonal range. With the right flexo technology at your disposal, you can easily improve your print contrast. Download our free Conquering Edge Definition white paper and we’ll explain the importance of print contrast and how to get it.
What exactly is print contrast?
Print contrast is determined by a spectrodensitometer. However, before you start diving into measuring your print contrast (and believe us, you should be measuring it), you need an understanding of exactly what we mean by the term print contrast. According to FIRST 6.0, print contrast is defined as “an indicator of a printing system’s capacity to hold image detail in the shadow region. Most desirable (highest) print contrast occurs with the simultaneous highest solid ink density and the lowest dot gain. Calculated using the ratio of the difference between the printed solid area density and a printed shadow tint area…to the density of the solid, expressed as a percentage.” That’s quite a mouthful, so for our purposes, we’ll define print contrast as being directly related to the comparison between the solid ink density and the 70 percent dot with print contrast in the 40 to 60 percent range being ideal (assuming you have good density and stable dot range throughout the image, we’ll discuss more on these elements later). When your print contrast is ideal, your tonal range expands and the shadow areas (your ¾ tones) now have the details necessary for your images to jump off the shelf.
How to Measure Print Contrast
Now that we have a shared working definition of print contrast, you’re ready to measure it. Using a spectrodensitometer, you will want to compare your solid ink density to the 70 percent tone to determine your percentage value for the print contrast. The information below details how to determine if your percentage values are yielding optimal print contrast:
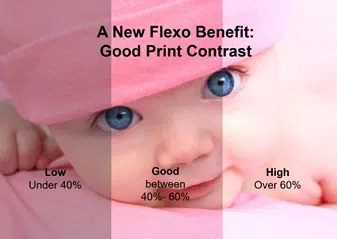
- 0 to 40% – low percentage range, not ideal. From the 70 to 100 percent tone, your tonal scales are plugging up if you are in this range and therefore, your graphic images are lacking detail in your ¾ tones.
- 40 to 60% – ideal percentage range. From 70 to 100 percent tone, your tonal scales are appropriately open and your graphic images are reflecting detail in your ¾ tones.
- 60 to 100% – high percentage range, not ideal. From 70 to 100 percent tone, your tonal scales are too open and graphic detail is lost.
If your print contrast falls into the ideal range of 40 to 60% from your 70 to 100 percent tone, congratulations, your flexo plate is providing you with one of the major tools you need to produce high-quality print images. If you are printing in the low and high percentage ranges, there’s good news here too, because you have a fantastic opportunity to obtain ideal print contrast which will expand your tonal range and bring added detail to your images.
Achieving Ideal Print Contrast
Remember earlier when I said that good density and stable dots are required to obtain ideal print contrast? Well, ideal print contrast relies upon controlling the gains in your ¾ tones. With this control, the flexo plate’s ability to lay down ink in a manner that will produce good density greatly improves. The plate needs to extract just the right amount of ink from the anilox roll, not too much and not too little. It also needs to be able to control ink flow at the edge of every dot, line, text character and solid area. Finally, the ink needs to be picked up by a dot that is stable and will hold its shape to reduce dot gain. So, if your print contrast fell into the low or high percentage ranges, then identifying a flexo plate that can lay down the right amount of ink for optimal density AND that has a stable dot AND will deter dot gain is the key to moving into the ideal percentage range for print contrast.
By measuring your print contrast, you have already taken the first step toward expanding your tonal range. If your print contrast is not ideal (40 to 60%), then you have an opportunity to expand your tonal range and deliver your customers the graphic design details that they desire. Want to learn if your flexo plate is capable of expanding your tonal range? Download our free Conquering Edge Definition article to learn more.